Living on the open road doesn’t mean sacrificing gourmet meals or settling for cold sandwiches. As we roll into 2026, the modern RV kitchen has evolved from a cramped afterthought into a functional culinary command center, and at the heart of this transformation sits the convection microwave oven. This ingenious dual-purpose appliance has become the undisputed workhorse for full-timers and weekend warriors alike, combining the reheating speed of a microwave with the browning, crisping, and baking prowess of a traditional oven—all while consuming precious little of your limited space and power resources.
But here’s the reality: not all convection microwaves are built to withstand the unique rigors of mobile life. The constant vibration of highway travel, the finicky power fluctuations of campground hookups, and the stringent space constraints of RV cabinetry create a perfect storm of challenges that residential models simply aren’t engineered to survive. Whether you’re boondocking off-grid in Utah’s backcountry or parked at a luxury resort in Florida, choosing the right unit requires understanding a complex interplay of electrical specifications, structural durability, and real-world cooking performance. This comprehensive guide cuts through the marketing noise to arm you with the expert knowledge needed to make a confident investment that will serve you for countless miles ahead.
Top 10 Convection Microwave Ovens for RV Living
Detailed Product Reviews
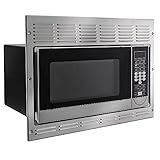
1. Furrion 2022007898 Over-The-Range Convection RV Microwave Oven - 1.5 cu. ft., Stainless Steel

Overview:
The Furrion 2022007898 is a premium over-the-range convection microwave engineered specifically for the rigors of RV travel. With 1.5 cubic feet of capacity and a stainless steel finish, it combines traditional microwaving with convection baking across ten precise temperature settings. Built to withstand constant vibration and road stress, this unit features flexible ventilation that can exhaust outside or recirculate internally, adapting to various RV configurations.
What Makes It Stand Out:
Furrion’s reputation for RV-specific durability shines through with vibration-resistant construction and thoughtful design elements. The ten convection temperature settings offer baking precision rarely found in mobile appliances, while the LED display provides crystal-clear visibility for timers and active functions. The dual venting configuration solves common RV installation challenges, and the included 30-watt appliance bulbs illuminate the cooking space effectively.
Value for Money:
At $557.66, this represents a significant investment, but one justified for serious RV enthusiasts. The specialized engineering for mobile environments means fewer replacements over time, while versatile cooking eliminates separate appliances. Compared to residential models that lack vibration resistance, the premium adds tangible value that full-time travelers will appreciate through years of reliable service.
Strengths and Weaknesses:
Pros include exceptional build quality, large capacity, flexible ventilation, precise convection control, and a finish that resists wear. The brand’s established RV reputation provides peace of mind. Cons are the premium price point and potentially more features than weekend campers require. Installation may need professional configuration for optimal venting.
Bottom Line:
For full-time RVers or those prioritizing reliability and performance, the Furrion is worth every penny. It’s a set-it-and-forget-it appliance that handles mobile living demands while delivering residential-quality results.
2. CONTOURE RV Over-the-Range Convection Microwave Oven: 1.6 Cu.Ft. | 1000W | LED | Express Cooking | Ventilation System | Black | RV-450BK-OTR

Overview:
The CONTOURE RV-450BK-OTR delivers family-sized cooking capability in a sleek black package optimized for RV kitchens. This 1.6 cubic foot convection microwave offers 1000W of power with RapidCook technology for faster, more even heating. A two-speed 300 CFM ventilation system effectively clears smoke and steam, while LED illumination brightens the cooking space. Ten power levels and preset options accommodate diverse cooking needs on the road.
What Makes It Stand Out:
The generous 1.6 cubic foot capacity stands out in the RV market, accommodating larger dishes for family meals. The powerful 300 CFM dual-speed fan significantly outperforms many competitors, effectively managing cooking fumes in compact spaces. The dishwasher-safe rotating glass tray ensures consistent heating while simplifying cleanup—a practical touch frequent travelers appreciate.
Value for Money:
Priced at $339.99, this model hits the sweet spot between features and affordability. You get convection cooking, robust ventilation, and family-friendly capacity without premium brand pricing. For families who cook regularly in their RV, this represents excellent value compared to buying separate appliances or pricier alternatives with similar specifications.
Strengths and Weaknesses:
Pros include large interior capacity, powerful ventilation, express cooking presets, and competitive pricing. The black finish provides a modern aesthetic. Cons include a lesser-known brand reputation compared to Furrion and potentially higher power draw from the robust fan. The unit may require more vent space than some RV cutouts provide.
Bottom Line:
The CONTOURE RV-450BK-OTR is an excellent choice for RV families needing space and ventilation power. It delivers residential-style cooking performance at a mid-range price, making it a smart investment for serious mobile cooks who refuse to compromise on capacity.
3. Tough Grade RV Convection Microwave with Air Fryer | 6-in-1 Built-In Combo Oven – Microwave, Grill, Convection, Broil, Air Fry, Combo | 1.0 Cu Ft | Trim Kit Included | Replaces High Pointe & Greystone

Overview:
The Tough Grade RV Convection Microwave revolutionizes mobile cooking by combining six functions into one compact appliance. This 1.0 cubic foot unit integrates microwave, convection, broil, grill, air fry, and combo cooking modes, eliminating the need for multiple devices in tight RV spaces. Designed as a direct replacement for High Pointe and Greystone models, it includes a trim kit for seamless installation and proper ventilation.
What Makes It Stand Out:
The six-in-one versatility is unmatched in the RV market, particularly the air frying capability that health-conscious travelers demand. The preset auto menu covers cakes, beverages, vegetables, and meats, while one-touch programs simplify popcorn, pizza, and potatoes. Multi-stage cooking allows programming complex recipes in advance, and ECO mode reduces standby power consumption—crucial for off-grid camping.
Value for Money:
At $419.99, this unit offers tremendous value by consolidating multiple appliances. Purchasing separate microwave, convection oven, and air fryer would cost significantly more and consume precious counter space. The included trim kit and direct replacement design save additional installation costs, making it a financially savvy choice for space-conscious RVers.
Strengths and Weaknesses:
Pros include exceptional versatility, space efficiency, energy-saving features, and easy replacement for popular models. The mute option and child lock add practical usability. Cons include a steeper learning curve to master all functions and smaller interior capacity compared to single-purpose units. Some users may find the control panel overly complex for basic reheating.
Bottom Line:
For minimalists and space-conscious RVers, this Tough Grade appliance is a game-changer. It delivers full kitchen functionality without the clutter, making it ideal for those who want to cook diverse meals without sacrificing storage space or breaking the budget.
4. RecPro RV Convection Microwave 1.1 cu. ft. | 120V | Microwave | Appliances | Direct Replacement for High Pointe and Greystone (Black)

Overview:
The RecPro RV Convection Microwave offers a straightforward replacement solution for RV owners seeking essential functionality without complexity. With 1.1 cubic feet of cooking space, this unit focuses on core microwave operations while providing eight express cook options for common foods. Designed as a direct drop-in replacement for High Pointe and Greystone models, it features touchpad controls, a four-digit LED display, and a child lock setting for family safety.
What Makes It Stand Out:
Its primary strength lies in hassle-free replacement, matching the dimensions and mounting of popular RV microwave brands. The express cook options eliminate guesswork for everyday items like popcorn, potatoes, and frozen vegetables. The compact footprint fits standard RV cabinets without modification, while the child lock provides essential safety for families traveling with young children—a frequently overlooked feature.
Value for Money:
At $349.95, this represents an affordable option for RVers needing reliable microwave performance without premium features. It’s priced competitively for a replacement unit and avoids the cost of professional installation or cabinet modifications. While lacking convection or air fry capabilities, it delivers solid basic performance where it counts for users who primarily reheat and defrost.
Strengths and Weaknesses:
Pros include easy installation for replacement scenarios, simple intuitive controls, child safety lock, and affordable price point. The 1.1 cubic foot capacity is reasonable for most RV cooking needs. Cons include no convection or advanced cooking modes, basic feature set, and RecPro’s shorter track record compared to legacy brands. The black finish may not suit all interior designs.
Bottom Line:
If you’re looking for a no-fuss microwave replacement that fits existing openings without breaking the bank, this RecPro model delivers. It’s perfect for RVers who primarily reheat and defrost rather than bake or air fry, offering reliable performance without unnecessary complexity.
5. RecPro RV Kitchen Air Fryer & Convection Microwave with Trim Kit | 1.0 Cu. Ft. | 120V | 6 Cooking Modes (Black)

Overview:
The RecPro RV Kitchen Air Fryer & Convection Microwave combines six cooking modes into a versatile 1.0 cubic foot package designed for modern RV living. This unit merges microwave, convection, broil, grill, air fry, and combo cooking with thoughtful features like one-touch programs for popular dishes and multi-stage cooking capability. The included trim kit ensures seamless built-in installation and proper airflow, while ECO mode reduces standby power consumption.
What Makes It Stand Out:
The comprehensive cooking versatility rivals more expensive units while maintaining RV-specific design considerations. One-touch programs for potatoes, pizza, and popcorn simplify daily cooking, while the auto menu handles cakes, vegetables, and beverages automatically. The ECO mode is a thoughtful addition for battery-conscious campers, and the child lock ensures safety. Multi-stage cooking allows programming complex recipes without monitoring.
Value for Money:
At $399.95, this model positions itself as a feature-rich alternative to premium brands without the premium price. The six cooking modes eliminate the need for separate appliances, saving both money and space. The included trim kit adds value by simplifying installation and providing a polished, integrated look that enhances resale value.
Strengths and Weaknesses:
Pros include excellent versatility, energy-efficient operation, direct replacement compatibility, and thoughtful safety features. The multi-stage cooking capability is genuinely useful for complex recipes. Cons include the smaller 1.0 cubic foot capacity and potentially overwhelming number of options for users wanting simplicity. Like other RecPro products, long-term reliability data is limited compared to established competitors.
Bottom Line:
This RecPro combo unit is ideal for tech-savvy RVers who want maximum cooking flexibility. It delivers impressive functionality at a mid-range price point, making it a smart choice for those who regularly cook diverse meals and appreciate having multiple cooking methods in one compact appliance.
6. RecPro RV Convection Microwave Stainless Steel 1.1 cu. ft | 120V | Microwave | Appliances | Direct Replacement for Greystone
Overview: The RecPro RV Convection Microwave delivers a direct replacement solution for Greystone units, offering 1.1 cubic feet of cooking capacity in a stainless steel package designed specifically for RV installations. Measuring 21"W x 11"H x 15.75"D without trim, it fits standard RV cutouts while the optional trim kit expands dimensions to 24.25"W x 18.25"H for a seamless built-in appearance.
What Makes It Stand Out: This unit’s primary distinction is its precise engineering as a drop-in Greystone replacement, eliminating installation headaches for RV owners. The stainless steel construction withstands road vibrations and temperature fluctuations inherent to mobile living. At 41 pounds, it’s robustly built for the rigors of travel while maintaining a compact footprint that respects limited RV space.
Value for Money: Priced at $329.95, this microwave sits in the mid-range for RV-specific appliances. While more expensive than generic countertop models, its direct-replacement design saves potentially hundreds in installation modifications. Competitors with similar RV-targeted designs typically run $300-$400, making this fairly priced for its niche purpose.
Strengths and Weaknesses:
- Strengths: Perfect dimensional match for Greystone replacements; durable stainless steel exterior; decent 1.1 cu ft capacity; straightforward operation
- Weaknesses: Heavy at 41 lbs; limited feature details provided; basic functionality compared to newer models; no mention of power levels or advanced cooking modes
Bottom Line: Ideal for RV owners seeking a hassle-free Greystone replacement without retrofitting cabinets. While it lacks advanced features, its precise fit and durable construction justify the price for targeted buyers prioritizing compatibility over cutting-edge technology.
7. Tough Grade RV Convection Microwave | Built-In 1.1 Cu. Ft. Oven | 10 Power Levels, Speedy Cook, Multi-Stage Cooking | Stainless Steel | Direct Replacement for Greystone | 120V Built-In Design

Overview: The Tough Grade RV Convection Microwave elevates mobile kitchen capabilities with 1.1 cubic feet of capacity and sophisticated cooking technology. Designed as a direct Greystone replacement, this built-in unit features comprehensive controls that transform your RV galley into a versatile cooking station without consuming precious counter space.
What Makes It Stand Out: Ten power levels and ten pre-programmed convection temperature settings provide restaurant-quality flexibility rarely seen in RV appliances. The multi-stage programming automatically transitions from defrosting to cooking, while Speedy Cook and Instant Start functions deliver rapid meal preparation. The integrated trim kit ensures a polished, space-saving installation that integrates seamlessly into existing cabinetry.
Value for Money: At $329.99, this unit dramatically outperforms its price point. It matches the cost of basic RV replacements while offering advanced features typically found in $400+ models. The combination of convection baking, multi-stage cooking, and comprehensive safety features represents exceptional value for serious RV chefs who demand versatility.
Strengths and Weaknesses:
- Strengths: Extensive cooking options; intuitive controls with child safety lock; weight and time defrost modes; kitchen timer; space-efficient built-in design
- Weaknesses: Feature-rich interface may overwhelm tech-averse users; RV-specific design limits residential reuse; no mention of actual wattage output
Bottom Line: A feature-packed powerhouse that redefines RV cooking expectations. For less than $330, you get convection versatility and smart programming that rivals residential appliances. Highly recommended for RV owners who refuse to compromise on culinary capability while traveling.
8. RecPro RV Microwave Over The Range 30" Convection Oven | Stainless Steel | 120V AC | 900W | Camper Microwave | Direct Replacement for Greystone and High Pointe

Overview: The RecPro Over-The-Range Convection Microwave revolutionizes RV kitchen design by eliminating countertop clutter. This 30-inch unit combines microwave and convection cooking with a space-saving overhead installation, making it ideal for RVs where every square inch matters. The 900W output and 1500W input provide robust cooking performance for diverse meals.
What Makes It Stand Out: The over-the-range configuration is a game-changer for RV space management, freeing up valuable counter space while providing ventilation benefits. Convection capabilities enable baking, broiling, and roasting functions typically impossible in compact RV kitchens. The included mounting hardware and stainless steel finish create a residential aesthetic that enhances your camper’s overall value.
Value for Money: At $534.95, this premium-priced unit justifies its cost through space optimization alone. In RVs where counter space equals preparation area, the overhead installation effectively expands your functional kitchen. Comparable residential over-the-range units cost $400-$600, making this competitively priced for its specialized RV engineering and durable, vibration-resistant construction.
Strengths and Weaknesses:
- Strengths: Maximizes counter space; versatile convection cooking; durable stainless steel; complete mounting hardware; powerful 1500W input
- Weaknesses: Highest price in category; complex installation requiring ventilation; 900W output is modest for the price; may not fit all RV configurations
Bottom Line: Perfect for RV owners prioritizing space efficiency and cooking versatility. While expensive and installation-intensive, the counter space gained and dual-function capability make it worthwhile for full-time RVers and serious cooks who value comprehensive kitchen functionality in their mobile lifestyle.
9. TOSHIBA Air Fryer Combo 8-in-1 Countertop Microwave Oven, with Convection, Broil, Odor Removal Mode, 12.4" Position Memory Turntable, Child-Lock, 1.0 Cu.ft, Black Stainless Steel, ML2-EC10SA(BS)

Overview: The Toshiba Air Fryer Combo 8-in-1 Microwave breaks the mold of traditional RV appliances by offering unprecedented versatility at an accessible price point. This 1.0 cubic foot countertop unit combines microwave, air fryer, convection oven, broiler, and deodorizer functions in a compact black stainless steel package that fits most RV galley spaces.
What Makes It Stand Out: The 8-in-1 functionality introduces air frying to the RV kitchen—a healthier cooking method that typically requires separate appliances. The innovative position memory turntable returns to its starting position after cooking, preventing spills when retrieving hot items. The two-step child lock adds mandatory safety, while odor removal mode keeps small RV interiors fresh and clean.
Value for Money: At $223.99, this unit dramatically undercuts RV-specific models while offering superior versatility. Residential combo ovens with similar features typically cost $250-$350, making this an exceptional value. The multi-function design eliminates need for separate air fryer, saving additional money and precious counter space in compact RV environments.
Strengths and Weaknesses:
- Strengths: Unmatched 8-in-1 versatility; affordable pricing; healthy air frying; position memory turntable; child safety lock; compact footprint
- Weaknesses: Not engineered for road vibrations; may require secure mounting; 1.0 cu ft capacity smaller than RV standards; fitment not guaranteed for all campers
Bottom Line: An outstanding value for stationary RVs or careful travelers willing to add vibration dampening modifications. The feature set and price are unbeatable, but full-time RVers should verify mounting stability and long-term durability before committing to this non-RV-specific appliance.
10. RecPro RV Kitchen Air Fryer & Convection Microwave with Trim Kit | 1.0 Cu. Ft. | 120V | 6 Cooking Modes (Stainless Steel)

Overview: The RecPro RV Kitchen Air Fryer & Convection Microwave merges two trending cooking technologies into one RV-specific appliance. This 1.0 cubic foot unit offers six cooking modes including dedicated air frying, bringing healthier cooking options to mobile kitchens while maintaining the compact dimensions and rugged durability RV life demands.
What Makes It Stand Out: As one of the few RV-designed microwaves with true air fry capability, this unit eliminates the need for a separate countertop air fryer. The one-touch programs for potatoes, pizza, popcorn, and more simplify meal prep in confined spaces. Multi-stage cooking allows unattended operation—set it to defrost then automatically switch to convection cooking while you explore outdoors.
Value for Money: Priced at $419.95, this unit commands a premium over basic RV microwaves but costs less than buying separate microwave and air fryer appliances. The included trim kit adds value, providing a built-in look that integrates seamlessly into RV cabinetry while protecting the unit during travel and road vibrations.
Strengths and Weaknesses:
- Strengths: RV-engineered for travel durability; combines air fry and convection; convenient one-touch presets; includes trim kit and accessories; multi-stage programming
- Weaknesses: 1.0 cu ft capacity smaller than standard 1.1 cu ft; $90 more than non-air fry models; limited to 6 modes versus competitors’ 8-10 functions
Bottom Line: The perfect solution for health-conscious RVers wanting air frying without sacrificing counter space. While slightly smaller and pricier than basic models, the dual-function convenience and RV-specific engineering justify the investment for regular travelers seeking culinary variety on the road.
Why a Convection Microwave is a Game-Changer for RV Living
Understanding the Dual-Functionality
The magic of a convection microwave lies in its ability to function as two distinct appliances sharing a single footprint. In microwave mode, it operates exactly like you’d expect—zapping leftovers, popping popcorn, and defrosting frozen items in minutes. Flip it to convection mode, and a heating element combined with a fan circulates hot air throughout the cavity, essentially creating a compact traditional oven that can roast chicken, bake cookies, and crisp pizza crusts to golden perfection.
For RVers, this versatility translates into dramatic lifestyle benefits. You’re no longer choosing between a microwave and an oven; you’re getting both without sacrificing half your galley space. Full-time travelers report using the convection feature for 60-70% of their cooking, reserving the microwave function primarily for reheating beverages and rapid defrosting. This hybrid approach eliminates the need for a separate propane oven—which can be temperamental at altitude and adds significant weight—and reduces dependency on campground propane supplies.
Space-Saving Benefits for Compact Kitchens
RV galley designers face a mathematical puzzle: every cubic inch must earn its keep. A quality convection microwave typically occupies just 1.5 to 2 cubic feet of space while replacing both a microwave (1.2 cubic feet) and a small oven (3+ cubic feet). That reclaimed space can house additional pantry storage, a compact dishwasher, or simply provide breathing room in an otherwise cluttered countertop.
The vertical integration possibilities are equally compelling. Over-the-range models combine ventilation, task lighting, and cooking functions into one unit, freeing up valuable counter space for food prep. For toy hauler owners or those with outdoor kitchens, some 2026 models offer weather-resistant trim kits that allow for exterior mounting, effectively expanding your culinary workspace beyond the RV’s four walls.
Key Differences Between Residential and RV Convection Microwaves
Power Consumption and Electrical Requirements
Residential convection microwaves are power-hungry beasts, often drawing 1,800-2,200 watts in convection mode—enough to overwhelm a 30-amp RV service or rapidly deplete battery banks. RV-specific models are engineered with efficiency in mind, typically operating in the 1,200-1,500 watt range while delivering comparable cooking performance through better insulation and optimized heating elements.
The critical specification is amperage draw. A 1,500-watt unit running on 120V AC pulls 12.5 amps, leaving precious little headroom on a 30-amp pedestal for running your air conditioner simultaneously. Smart RVers look for models with variable power settings that can throttle down to 900 watts for generator or inverter operation, then ramp up to full power when connected to robust 50-amp service.
Size and Dimensional Constraints
While residential units are designed for standard kitchen cabinets (typically 30" wide), RV cabinetry follows no such universal standards. Most RV convection microwaves max out at 24" width to fit common cutouts, with depths carefully limited to 18-20" to avoid protruding into narrow walkways. The height becomes crucial in over-the-range installations where clearance above a cooktop is regulated by safety standards.
Dimensional tolerances are tighter in RV models. Where a residential unit might have 1/4" wiggle room in a cabinet, RV versions are built to exacting specifications with mounting brackets that accommodate the flex and twist of a moving vehicle. The trim kits are reinforced with steel backing plates rather than flimsy plastic, preventing the unit from becoming a projectile during sudden stops.
Vibration and Durability Standards
This is where the rubber meets the road—literally. RV convection microwaves must survive tens of thousands of miles of vibration, potholes, and temperature extremes. Manufacturers achieve this through circuit boards coated in vibration-dampening conformal coating, reinforced door latches with double-locking mechanisms, and transformer mounts that use silicone isolation pads rather than rigid fasteners.
The internal chassis construction differs significantly. While residential models use spot-welded sheet metal, RV-grade units employ riveted and bolted assemblies with thread-locking compounds on critical fasteners. The magnetron—the heart of any microwave—is mounted on a floating suspension system in quality RV models, preventing the filament from fracturing during transport. Look for units tested to MIL-STD-810G standards for shock and vibration, even if the manufacturer doesn’t explicitly advertise it.
Essential Features to Look for in 2026 Models
Smart Technology Integration
The 2026 model year brings meaningful connectivity that goes beyond gimmicky smartphone apps. True RV-focused smart features include automatic voltage sensing that alerts you to pedestal power issues before they damage the appliance, and GPS-linked operation that prevents the unit from running while the RV is in motion—eliminating the classic “did I leave the oven on?” anxiety.
Bluetooth-enabled temperature probes now transmit internal meat temperatures directly to your phone, allowing you to monitor that roast chicken while relaxing outside under the awning. Some advanced models integrate with whole-RV management systems like Firefly or SilverLeaf, displaying oven status on your central control panel alongside tank levels and climate controls. The key is choosing a unit where the technology solves real RV problems rather than just adding complexity.
Inverter Technology for Precision Cooking
Traditional convection microwaves cycle power on and off to maintain temperature, creating hot spots and inconsistent results. Inverter technology delivers consistent, variable power levels—crucial for delicate tasks like melting chocolate or softening butter without scorching. For RVers running on generators or inverters, this smooth power draw is gentler on your electrical system and produces cleaner sine waves that won’t interfere with sensitive electronics.
Inverter-based units also heat more efficiently, reducing cooking times by 15-20% compared to conventional transformer models. This translates directly into power savings when boondocking. The technology enables true simmering capabilities in convection mode, expanding your menu options to include slow-cooked stews and braises that previously required a separate crockpot.
True Convection vs. Fan-Assisted Heating
Marketing departments love to throw around “convection” terminology, but there’s a critical distinction. True convection (also called European convection) includes a third heating element surrounding the fan, providing precise temperature control and eliminating the need to rotate pans. Fan-assisted heating simply circulates microwave-generated air, offering modest improvement over standard microwaves but falling short of real baking performance.
For RV applications, true convection is worth the premium. The consistent heat distribution means you can bake three racks of cookies simultaneously—a huge advantage when cooking for family or entertaining fellow campers. The temperature accuracy (typically ±5°F vs. ±25°F for fan-assisted) ensures your recipes work as written, reducing food waste and frustration. Look for models with a convection element rated at least 1,400 watts for proper browning capability.
Interior Capacity Considerations
The sweet spot for RV convection microwaves falls between 1.2 and 1.5 cubic feet. Smaller than 1.0 cubic feet severely limits your ability to cook full meals, while units approaching 2.0 cubic feet often prove too heavy and power-hungry for practical RV use. The interior dimensions matter more than the rated capacity—a wide, shallow cavity accommodates pizza boxes and casserole dishes better than a deep, narrow space.
Consider the turntable diameter. A 13.5" turntable handles most dinner plates and 9x13" pans, while 12" models force you to use smaller cookware. The ability to disable the turntable in convection mode is essential for using rectangular baking dishes. Some 2026 models feature recessed turntables that drop flush with the cavity floor, creating a completely flat surface for convection cooking—a brilliant innovation that maximizes usable space.
Power Management for RV Convection Microwaves
Amperage Draw and Circuit Requirements
Your RV’s electrical system is a finite resource, and your convection microwave is often the hungriest appliance onboard. A typical 1,500-watt unit draws 12.5 amps at 120V AC, but inrush current during startup can spike to 18-20 amps for several seconds. This momentary surge frequently trips campground breakers, especially on shared 30-amp circuits that have already been weakened by years of use.
Smart power management begins with dedicated circuit installation. Never share a breaker with other high-draw appliances like water heaters or air conditioners. For 30-amp RVs, consider having an electrician install a separate 20-amp circuit solely for the convection microwave, fed directly from the main panel with 12-gauge wire. This prevents the cascade failures that leave you without cooking capability when the pedestal voltage drops below 110V.
Generator vs. Shore Power Operation
Running your convection microwave on generator power requires careful consideration of total load. A 3,000-watt generator can theoretically handle a 1,500-watt microwave, but add the air conditioner (1,500 watts starting) and battery charger (200 watts), and you’re instantly overloaded. The solution is staged operation: run the convection microwave alone, then add other loads once preheating is complete.
Inverter generators produce cleaner power that’s gentler on microwave electronics, but their eco-throttle feature can cause voltage fluctuations under varying loads. Disable eco-mode when running the convection feature to maintain stable voltage. For boondockers relying on portable generators, consider a unit with “generator mode” that automatically reduces power draw by 20-30% to prevent overload, extending cooking times but ensuring reliable operation.
Solar Compatibility Considerations
The dream of running a convection microwave entirely on solar is achievable but requires realistic expectations. A 1,500-watt unit running for 30 minutes consumes 750 watt-hours—equivalent to the daily output of a 300-watt solar array in ideal conditions. The math works for occasional use, but daily convection cooking demands a substantial system: 600+ watts of solar, 400Ah of lithium batteries, and a 2,000-watt pure sine wave inverter.
The inverter is the linchpin. Modified sine wave inverters can damage microwave electronics and reduce cooking efficiency by 20-30%. Invest in a quality pure sine wave unit with surge capacity at least double the microwave’s rated wattage. Time your cooking for peak solar hours (10am-3pm) to draw directly from panels rather than depleting batteries. Some advanced RVers install a “load shed” controller that automatically disables the microwave when battery voltage drops below 12.0V, preventing deep discharge damage.
Size and Installation Fundamentals
Measuring Your RV Cabinet Cutout
Precision measurement is non-negotiable. RV manufacturers often build cabinets to “nominal” dimensions that don’t account for wall thickness, wiring channels, or structural supports. Measure the cutout width, height, and depth in three places each—top, middle, bottom for height; left, center, right for width—and use the smallest dimension. Account for the door swing: allow 2-3 inches of clearance beyond the unit’s width for hinge articulation.
Don’t forget the rear clearance. Most units require 1-2 inches of space behind for proper ventilation, but some need up to 4 inches if the exhaust vents through the back rather than the top or front. Use a flexible measuring tape to check for obstructions like plumbing, ductwork, or electrical boxes that might not be visible from the front. Photograph the cavity with your phone, using the flash to reveal hidden issues before you order a unit.
Trim Kit Requirements and Ventilation
A proper trim kit does far more than provide aesthetic appeal—it structurally reinforces the installation and directs ventilation airflow. RV-specific trim kits include steel mounting brackets that distribute the unit’s weight across the cabinet face frame, preventing the screw-tearout failures common with residential installations. The kit’s ventilation ducting is fire-rated and sized precisely to the microwave’s exhaust specifications.
Ventilation direction is a critical decision. Front-venting models exhaust through the bottom of the unit, requiring no external ductwork—ideal for interior cabinets. Top-venting units need a duct routed through the cabinet ceiling, often connecting to an existing range hood vent. Rear-venting designs provide the cleanest look but demand precise alignment with a wall penetration. Never attempt to use a residential trim kit in an RV; the plastics will crack from vibration, and the mounting hardware won’t withstand the dynamic loads of travel.
Over-the-Range vs. Countertop Configurations
Over-the-range (OTR) installations dominate modern RV design for good reason: they reclaim counter space and integrate ventilation. However, they place the controls at eye level for shorter users and can make monitoring food difficult. OTR units also transmit more heat to the cabinet above, potentially damaging sensitive electronics stored there. Ensure your OTR installation includes a heat shield between the microwave and cabinet bottom.
Countertop models offer superior accessibility and easier replacement but consume valuable prep space. The emerging trend in 2026 is the “micro-cabinet” installation: a dedicated pull-out drawer beneath the countertop that houses the convection microwave, allowing it to slide out for use and tuck away for travel. This hybrid approach requires robust drawer slides rated for at least 75 pounds dynamic load and positive locking mechanisms that engage automatically when retracted.
Ventilation and Safety Requirements
Proper Airflow Clearance
Convection mode generates significant heat—exterior surfaces can reach 140°F during extended baking. RV cabinets, typically constructed of 1/2" plywood or MDF, are more susceptible to heat damage than residential cabinetry. Maintain minimum clearances of 2 inches on sides, 4 inches on top, and 1 inch behind, even if the manufacturer specifies less. These margins account for the reduced airflow in RVs caused by tight installations and surrounding insulation.
Inadequate ventilation triggers thermal protection circuits that shut down the unit mid-cooking, a frustrating experience that can ruin meals and damage the appliance. Install a supplemental ventilation fan in the cabinet cavity if clearances are tight—small 12V computer fans wired to run whenever the microwave operates can reduce cavity temperatures by 30°F. Monitor temperatures with an infrared thermometer during the first few uses; any surface exceeding 120°F needs additional ventilation.
Grease and Carbon Filters Explained
OTR convection microwaves include filtration systems that capture cooking contaminants. Grease filters are metal mesh screens that trap airborne oil particles; they should be dishwasher-safe and removable from the front without uninstalling the unit. Carbon (charcoal) filters adsorb odors and should be replaced every 6-12 months depending on cooking frequency. In RVs, this interval shortens to 4-6 months due to the confined living space amplifying odor issues.
Never operate an OTR unit without filters installed. The blower motor will suck grease directly into the internal electronics, causing premature failure. Keep spare carbon filters onboard; they’re model-specific and can be impossible to source in remote areas. Some full-timers upgrade to aftermarket HEPA filters that capture finer particles, reducing the greasy film that inevitably coats nearby cabinet surfaces—a common complaint in RV kitchens.
Fire Safety Features to Demand
RVs present unique fire risks: confined spaces, flammable materials nearby, and delayed emergency response times. Your convection microwave must include a UL-923 commercial cooking certification, not just residential approval. Look for models with dual thermal sensors—one monitoring cavity temperature, the other monitoring exterior cabinet temperature—that trigger automatic shutdown before ignition temperatures are reached.
The door latch should include a positive-locking mechanism that cannot be jostled open during travel, preventing accidental activation. Units with “travel lock” modes that electronically disable all controls provide an extra layer of security. Consider installing a small ABC fire extinguisher in the cabinet adjacent to the microwave, mounted in a quick-release bracket. Smoke detectors in RVs should be photoelectric type near the kitchen; ionization detectors are prone to false alarms from cooking but miss slow, smoldering electrical fires.
Weight Considerations for Travel Days
How Weight Impacts Your RV’s GVWR
That sleek convection microwave adds 50-75 pounds to your rig’s weight, and in the world of RVs, every pound matters. When mounted in an over-the-range position, this weight sits high in the chassis, negatively impacting center of gravity and potentially reducing stability in crosswinds. For motorhomes especially, high-mounted weight contributes to body roll and requires more driver input to maintain lane position.
Calculate the weight impact using the formula: (microwave weight + trim kit + mounting hardware) x 1.2 to account for dynamic loads during travel. If this exceeds 90 pounds, consider reinforcing the cabinet structure with additional L-brackets tied into the RV’s wall studs. For fifth wheels and travel trailers, excessive tongue weight already challenges tow vehicle capacity; that 75-pound microwave installed in the front galley directly adds to this burden.
Distribution and Balance Best Practices
Balance the microwave’s weight by evaluating the entire slide room’s load distribution if your kitchen resides on a slide. Heavy appliances concentrated on one side can cause slide mechanisms to bind and wear prematurely. Ideally, position the microwave on the RV’s centerline or slightly toward the roadside to counterbalance the weight of the entry door and awning hardware on the curbside.
During installation, use a torque wrench to tighten mounting screws to the manufacturer’s specification—typically 8-12 inch-pounds for #10 screws into plywood. Over-tightening crushes the wood fibers, reducing holding power by 50% or more. Use fender washers under screw heads to distribute load and prevent pull-through. After the first 500 miles of travel, retorque all fasteners; vibration causes them to loosen, and a microwave crashing onto the cooktop during a panic stop creates both a safety hazard and expensive damage.
Cooking Performance Factors
Preheat Times and Temperature Accuracy
RV convection microwaves typically require 7-12 minutes to reach 350°F—longer than residential ovens due to smaller heating elements and less thermal mass. This isn’t necessarily a drawback; it gives you time to prep ingredients while the unit warms up. However, inconsistent preheat indicators plague lower-quality models. A quality unit will beep at 90% of target temperature, then use residual heat to coast to the setpoint, ensuring the cavity is fully saturated with hot air.
Temperature accuracy varies dramatically. Budget models may display 350°F while the actual cavity temperature swings between 320°F and 380°F—a 60°F variance that ruins delicate baked goods. Invest in an inexpensive oven thermometer and verify your unit’s accuracy during the first week. If variance exceeds 25°F, the thermostat may need recalibration or replacement. Some 2026 models include user-accessible calibration menus, allowing you to offset the temperature reading by ±15°F to compensate for individual unit quirks.
Even Heat Distribution Technologies
The bane of convection cooking is uneven browning—cookies burnt on one side, pale on the other. Quality RV units address this with dual convection fans (one each on top and bottom) that reverse direction periodically, eliminating dead spots. Look for models with a “convection conversion” feature that automatically reduces recipe temperatures by 25°F and cooking times by 20-30% when convection mode is selected, compensating for the more efficient heat transfer.
The cavity shape matters more than you might think. Units with a rounded rear wall promote better airflow circulation than square corners, which create eddies and cold zones. Some premium models incorporate a third heating element in the back wall, creating a true three-zone heating system that rivals residential ovens. For RVers who bake bread or pizza, a model with a “pizza mode” that concentrates heat on the bottom element produces authentic crispy crusts impossible with standard convection settings.
Multi-Rack Cooking Capabilities
Space constraints make multi-rack cooking essential in RVs—you need to maximize every cubic inch. However, cramming three racks into a 1.5 cubic foot cavity creates challenges. Airflow becomes restricted, and the top rack can block heat from reaching lower levels. The solution is adjustable rack positions with at least 3" of vertical separation. Some 2026 models include a “rack sensing” feature that adjusts fan speed and heating element cycling based on how many racks are inserted, optimizing performance for the load.
When using multiple racks, rotate them halfway through cooking—top to bottom, front to back—to ensure even results. Avoid dark-colored pans, which absorb more radiant heat and can cause uneven browning. Instead, use light-colored aluminum or stainless steel bakeware that reflects heat for more consistent results. Silicone baking mats placed on racks improve airflow underneath pans, preventing soggy bottoms on biscuits and pastries.
Noise Levels: What to Expect
Decibel Ratings During Operation
Convection microwaves generate noise from three sources: the cooling fan, the convection fan, and the magnetron hum. Combined, they typically produce 55-65 decibels—comparable to normal conversation. However, RVs lack the sound-dampening insulation of stick-built homes, making these appliances seem louder. The cooling fan often runs for 5-10 minutes after cooking completes, a design feature that prevents component overheating but can be annoying in tight quarters.
Manufacturers rarely publish decibel specifications, forcing you to rely on owner reviews. Pay attention to comments about high-pitched whines or rattling noises—these indicate poor fan bearing quality that will worsen over time. During in-store demonstrations, place your hand on the unit’s exterior; excessive vibration felt through the cabinet suggests inadequate isolation mounting that will eventually fatigue internal components.
Quiet Mode Features
Emerging in 2026 models, “quiet mode” reduces fan speed by 30-40% during convection cooking, accepting slightly longer cook times in exchange for reduced noise. This feature is invaluable for late-night baking or early morning coffee reheating when your partner is sleeping just feet away. The trade-off is higher external temperatures, so only use quiet mode when you can monitor the appliance and ensure adequate ventilation.
Some units include a “night mode” that disables all beeps and reduces display brightness to near-zero, preventing sleep disruption in studio-style RV layouts. For maximum peace, look for models where the convection fan can be programmed to run at reduced speed for the entire cooking cycle, not just during a special mode. This requires a variable-speed fan motor, a premium feature found in mid-tier and higher models.
Cleaning and Maintenance in a Mobile Environment
Self-Cleaning Functions
Traditional self-cleaning ovens reach 900°F, a temperature that would damage microwave electronics and pose a serious fire risk in an RV. Instead, RV convection microwaves offer “steam clean” or “easy clean” cycles that soften grime at a safe 250°F. Pour a cup of water with lemon juice into the cavity, run the cycle for 20 minutes, and wipe away the loosened debris. This method is effective for light soils but won’t touch baked-on grease.
Never use commercial oven cleaners—they contain caustic chemicals that attack the cavity’s protective coating and can off-gas toxic fumes in the confined RV space. For stubborn stains, make a paste of baking soda and water, apply it to cooled surfaces, let it sit overnight, then scrub gently with a plastic scraper. Avoid steel wool or abrasive pads that scratch the stainless steel, creating crevices where bacteria can thrive and causing rust in the humid RV environment.
Steam Cleaning Features
Dedicated steam cleaning cycles represent a significant 2026 upgrade. These inject measured amounts of water onto a heated element, creating pressurized steam that penetrates crevices and loosens baked-on food without chemicals. The cycle completes in 15 minutes, and the resulting condensation drains into a removable tray rather than pooling in the cavity bottom. This feature is particularly valuable for RVers who dry camp, as it reduces water usage compared to manual scrubbing.
For daily maintenance, keep a spray bottle with equal parts water and white vinegar. A quick spritz after each use prevents buildup and eliminates odors. The vinegar’s acidity neutralizes alkaline food residues and acts as a natural disinfectant. Wipe with microfiber cloths that won’t leave lint on the door seal—a common cause of microwave energy leakage if the seal becomes compromised.
Filter Maintenance Schedules
Grease filters need cleaning every 2-4 weeks depending on cooking frequency. Remove them and soak in a sink with hot water and degreasing dish soap for 30 minutes, then scrub with a soft brush. Dishwasher cleaning is acceptable but runs the risk of discoloring the metal over time. Never reinstall wet filters; they must air-dry completely to prevent mold growth in the humid RV environment.
Carbon filters require replacement every 4-6 months. Mark your calendar, as there’s no visual indicator of saturation. Keep a spare set in your RV’s parts bin—order them when you purchase the microwave to ensure availability. Some full-timers extend filter life by removing them during travel and storing them in sealed plastic bags, preventing them from adsorbing ambient odors and humidity that reduce their effectiveness.
Warranty and Support Considerations
RV-Specific Warranty Coverage
Standard appliance warranties explicitly exclude mobile or marine applications, leaving you uninsured if a failure occurs while traveling. RV-specific warranties cover vibration damage, voltage fluctuations, and installation in non-standard orientations—common exclusions in residential policies. The gold standard is a 2-year full replacement warranty with a 5-year limited warranty on the magnetron and convection element.
Read the fine print regarding “commercial use.” Full-time RV living often qualifies as commercial use in warranty language, voiding coverage after as little as 90 days. Seek manufacturers that explicitly state “full-time RV use approved” in their warranty documentation. Keep your original purchase receipt and installation photos; warranty claims for RV applications frequently require proof of proper installation to prevent denial.
Mobile Technician Networks
When your convection microwave fails in rural Montana, you can’t simply call the local appliance repair shop. Major RV appliance manufacturers maintain networks of mobile certified technicians who travel to your location. Before purchasing, verify that the brand has at least three authorized mobile techs within 200 miles of your typical travel routes. The manufacturer should provide a national service hotline with 24/7 availability for warranty emergencies.
Consider brands with “depot repair” options where you can ship the unit to a central facility for flat-rate repair. While this means being without the appliance for 2-3 weeks, it’s often faster than waiting for a mobile tech’s schedule and can be 40-60% cheaper for out-of-warranty repairs. Some full-timers purchase refurbished backup units to use during depot repair periods, maintaining their cooking capability.
Replacement Parts Availability
Microwave magnetrons have a finite lifespan—typically 5-7 years under heavy RV use. Convection elements burn out, door switches fail from vibration, and control boards succumb to power surges. Before buying, search online for replacement parts for that specific model. If you can’t find a magnetron or control board, you’re buying a disposable appliance. Reputable RV appliance manufacturers guarantee parts availability for 10 years from the model’s discontinuation date.
Join owner forums and Facebook groups for your chosen model. These communities often discover interchangeable parts from other brands or develop DIY repair procedures that extend appliance life indefinitely. They’ll also alert you to emerging issues before they become catastrophic failures. The most valuable replacement part to keep onboard is the door latch assembly—a $15 part that can render the unit unusable if it fails in a remote location.
Budget Planning and Value Assessment
Price vs. Performance Sweet Spots
The RV convection microwave market stratifies into three tiers. Budget models ($300-450) offer basic convection capability but sacrifice durability and temperature accuracy. Mid-range units ($450-700) provide the best value: true convection, inverter technology, and RV-specific construction. Premium models ($700-1,200) add smart features, superior materials, and extended warranties that justify the cost for full-timers.
The performance jump from budget to mid-range is dramatic—imagine going from a $15 toaster to a $150 toaster oven. The jump from mid-range to premium is incremental but meaningful for those who cook daily. For weekend warriors using the unit 20-30 times annually, mid-range offers optimal ROI. Full-timers should invest in premium; the extended lifespan and reduced failure rate pay for themselves within two years of continuous use.
Hidden Costs: Installation and Accessories
The sticker price is just the beginning. Professional installation runs $200-400 depending on electrical work required. A quality trim kit adds $75-150. You’ll need cookware: microwave-safe convection pans ($30-60), a temperature probe ($25), and potentially a storage cover ($20). Factor in a pure sine wave inverter upgrade ($300-800) if you plan to run it off-grid.
Don’t forget the weight cost. At 75 pounds installed, you’re potentially reducing your cargo capacity by that amount. For travel trailers, this might mean leaving behind a generator or water jugs. Calculate the total cost of ownership: purchase price + installation + accessories + (weight penalty x $3 per pound of cargo capacity) + expected energy costs over 5 years. This holistic view often reveals that a $900 premium model is cheaper long-term than a $400 budget unit.
Long-Term ROI for Full-Time RVers
Full-time RVers who eliminate restaurant meals save $800-1,200 monthly. A quality convection microwave that enables this lifestyle pays for itself in weeks, not years. More importantly, it preserves resale value. RVs with upgraded, well-maintained appliances command 5-10% higher prices than those with original equipment. A $900 convection microwave can add $2,000+ to your RV’s sale price after five years of use.
Consider the cost of failure. A budget unit failing in year two requires replacement, another installation fee, and potential cabinet damage from removal. A premium unit lasting 8-10 years amortizes to $90-110 annually versus $200+ annually for replacing budget models. The peace of mind alone—knowing your appliance won’t fail during a holiday weekend in a sold-out campground—is worth the premium for most serious travelers.
Common Installation Mistakes to Avoid
Electrical Oversights That Cause Damage
The most devastating error is improper grounding. RV electrical systems are notorious for “floating grounds” and reversed polarity at campground pedestals. Install a dedicated ground wire from the microwave’s chassis directly to the RV’s frame, bypassing the potentially compromised circuit ground. Use a surge protector with voltage monitoring that cuts power when voltage drops below 104V or exceeds 132V—conditions that instantly destroy microwave electronics.
Never use wire nuts in RV AC wiring. The constant vibration loosens them, creating arcing and fire hazards. Instead, use crimp connectors with heat-shrink insulation or lever-style wire connectors (like Wago) that maintain constant tension. Undersized wiring is another common sin: 14-gauge wire is inadequate for a 12.5-amp continuous load. Use 12-gauge minimum, and if the run exceeds 25 feet from the breaker panel, upgrade to 10-gauge to prevent voltage drop.
Ventilation Errors That Void Warranties
Sealing the microwave into a tight cabinet with no airflow path is the fastest way to warranty voidance and premature failure. Every convection microwave requires both intake and exhaust air paths. Blocking either with custom cabinetry or insulation causes overheating within minutes. The installation manual specifies minimum free-air volume for the cabinet cavity—typically 200-300 cubic inches. Measure your cavity and ensure compliance.
Using flexible ducting for exhaust ventilation seems convenient but creates backpressure that reduces airflow by 40-60%. Use rigid metal ducting with smooth interiors, minimizing bends. Each 90-degree elbow reduces effective airflow equivalent to adding 5 feet of straight duct. If you must use flexible ducting, stretch it completely taut and support it every 12 inches to prevent sagging that creates airflow-killing kinks.
Securing for Travel: Anti-Vibration Mounts
Standard mounting screws provide zero vibration isolation. Upgrade to shoulder washers made from neoprene or silicone between the microwave flange and cabinet face. These compressible washers absorb vibration before it transmits to the unit’s chassis. For extreme-duty applications—think Alaskan highway travel—consider installing the microwave on a slide-out tray with industrial-grade vibration isolators rated for 100+ pounds.
The door must be positively secured during travel. Many units include a travel lock, but it’s often just a software setting that can be accidentally overridden. Install a physical latch—like a child safety lock or a velcro strap with a metal buckle—on the door handle. This prevents the door from bouncing open, which not only risks damage but also defeats the door safety interlock, potentially allowing microwave energy to escape. Check this latch as part of your pre-departure checklist, just like inspecting tire pressure.
Frequently Asked Questions
Can I install a residential convection microwave in my RV if I reinforce it?
While physically possible, it’s a false economy. Residential units lack vibration-resistant components, RV-specific safety certifications, and proper voltage tolerance. The cost of reinforcement, custom trim kits, and eventual premature failure exceeds the price difference of an RV-rated model. Additionally, your RV insurance may deny claims for fire damage if non-RV appliances are installed. The one exception: if you’re converting a stationary tiny home on a trailer frame that never moves, residential units become viable.
How long should my RV convection microwave last with full-time use?
Quality RV-rated units should deliver 7-10 years of reliable service with proper maintenance. Budget models typically fail in 2-4 years. The magnetron is usually the first major component to fail, followed by door latch mechanisms and convection element relays. Full-timers can extend lifespan by 30-40% by using a high-quality surge protector, maintaining strict voltage parameters, and running the unit on reduced power settings when possible. Keep a maintenance log documenting cleaning dates and any anomalies—this data helps predict failures before they strand you.
What’s the best way to clean the convection element and fan?
Never attempt to clean the convection element directly—it’s a sealed unit, and any cleaning attempts risk damage. Instead, run the steam clean cycle monthly to dissolve grease that splatters onto it. The convection fan is typically inaccessible without major disassembly. If it becomes noisy or unbalanced, the bearings have likely failed and require professional replacement. Preventative maintenance: always cover dishes with silicone lids or parchment paper to minimize splatter reaching the element and fan housing.
Can I run my convection microwave on a 2,000-watt inverter?
Technically yes, but practically risky. A 1,500-watt microwave exceeds 80% of a 2,000-watt inverter’s continuous rating, leaving no headroom for voltage spikes or simultaneous loads. The startup surge can peak at 2,200+ watts, potentially damaging the inverter. If you must use a 2,000-watt inverter, ensure it’s pure sine wave with 3,000+ watt surge capacity, and disable all other AC loads during operation. For reliable performance, a 3,000-watt inverter is the practical minimum.
Why does my convection microwave shut off when I run the air conditioner?
You’re experiencing voltage sag. Both appliances draw high current simultaneously, dropping voltage below the microwave’s safety threshold (typically 104V). The microwave’s protection circuit shuts it down to prevent damage. Solutions: upgrade to a 50-amp service if possible, install a voltage booster/autotransformer at the pedestal, or simply stagger usage—preheat the oven before turning on the AC, then turn off the AC during peak microwave cooking times. Some 2026 models include “low voltage operation” modes that reduce power draw by 30% to prevent shutdowns.
How do I prevent moisture damage in humid climates?
RV convection microwaves are particularly vulnerable to internal condensation in humid environments like Florida or the Pacific Northwest. Always leave the door ajar for 30 minutes after cooking to allow moisture to escape. Store the unit with the door open when the RV is parked long-term. Place a small, rechargeable dehumidifier in the cabinet cavity during storage. If you notice fogging on the door glass during preheating, your unit has excessive internal moisture—run a 10-minute convection cycle at 250°F with the door open to dry it out completely.
What size generator do I need to run a convection microwave?
For a 1,500-watt microwave, a 3,500-watt generator provides comfortable headroom. This allows running the microwave at full power while maintaining 1,500 watts for other essential loads like battery charging and refrigerators. If the microwave is your only high-draw appliance, a 2,500-watt generator suffices but requires careful load management. Inverter generators are mandatory—their clean power protects sensitive microwave electronics from the voltage spikes common in conventional generators.
Is it normal for the exterior to get hot during convection mode?
Yes, but with limits. The top and sides will reach 120-140°F during extended baking—hot enough to be uncomfortable but not dangerous. The door handle should remain below 100°F. If exterior surfaces exceed 150°F, you have inadequate ventilation and risk heat damage to surrounding cabinetry. Install a supplemental cooling fan or increase clearance by trimming cabinet openings. Never use the convection feature with items stored on top of the microwave; the heat can melt plastics and damage electronics.
Can I bake bread and pizza in an RV convection microwave?
Absolutely, with proper technique. Use the convection mode exclusively—never combination microwave-convection for bread, as it creates tough textures. Preheat for the full recommended time to ensure even heat distribution. For pizza, use a preheated pizza stone or steel placed on the lowest rack position; this stores thermal energy and compensates for the door opening’s temperature drop. For bread, place a small cast iron pan in the bottom of the cavity and add ice cubes when loading the dough; the steam creates artisan-style crusts. Expect 10-15% longer bake times than residential recipes due to the smaller cavity and lower thermal mass.
How do I know when it’s time to replace my RV convection microwave?
Replace when repair costs exceed 50% of a new unit’s price, or when critical parts become unavailable. Warning signs that precede catastrophic failure: intermittent power issues, door latch requiring multiple attempts, convection fan making grinding noises, or temperature swings exceeding 50°F. Also consider replacement if your cooking needs have evolved—upgrading from weekend camping to full-time living warrants a more durable, feature-rich model. Newer 2026 units offer 30% better energy efficiency and smart features that significantly improve the RV lifestyle experience, making upgrades attractive even for functional older units.