Transform your kitchen into a cutting-edge food laboratory without breaking the bank. Molecular gastronomy—the fascinating intersection of culinary art and food science—has evolved from restaurant-exclusive technique to an accessible home hobby that demystifies the chemistry behind what we eat. While professional-grade equipment can cost hundreds, a growing market of thoughtfully curated kits now delivers authentic spherification, gelification, and emulsification experiences for under $75, making this scientific culinary journey attainable for students, home cooks, and curious food enthusiasts alike.
Understanding what distinguishes a worthwhile investment from a disappointing chemistry set requires more than scanning ingredient lists. The best molecular gastronomy kits balance safety, educational depth, and genuine scientific principles while providing tools that won’t crumble after a single experiment. Whether you’re a culinary student seeking hands-on textbook applications, a parent nurturing a young food scientist’s curiosity, or a home cook ready to craft caviar-like pearls from fruit juice, knowing how to evaluate these kits ensures your budget delivers maximum scientific and culinary value.
Top 10 Molecular Gastronomy Kits
Detailed Product Reviews
1. Molecule-R - Molecular Gastronomy Starter Kit + FREE Recipe Book - Spherification Kit - CUISINE R-EVOLUTION
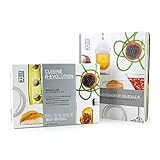
Overview: The Molecule-R Cuisine R-Evolution kit positions itself as a complete molecular gastronomy starter package for home cooks. At $69.99, it includes essential tools like a silicone mold, slotted spoon, syringe, piping tubes, and four key food additives (agar-agar, calcium lactate, sodium alginate, and soy lecithin) totaling 40g across 20 packets. The kit comes with both a printed instruction booklet and a free recipe book, promising to demystify techniques like spherification, gelification, and emulsification.
What Makes It Stand Out: This kit excels in accessibility, targeting beginners with step-by-step guidance and hundreds of online tutorials. Specific recipe examples like lemon foam clouds, balsamic vinegar pearls, and chocolate spaghetti provide concrete starting points rather than abstract concepts. The inclusion of both a basic instruction booklet and a separate recipe book adds value, while the Molecule-R brand recognition lends credibility in the molecular gastronomy space.
Value for Money: At $69.99, the kit offers reasonable value for the included tools and educational materials. The physical tools alone would cost approximately $30-40 separately, making the additives and recipe resources a worthwhile bonus. However, the 40g total additive quantity is modest and will require replenishment for extensive experimentation.
Strengths and Weaknesses: Strengths include beginner-friendly instructions, comprehensive tool set, and brand support network. Weaknesses are the limited additive quantity and potential need for ingredient resupply. The plastic tools, while functional, may not satisfy users seeking professional-grade durability.
Bottom Line: An excellent entry point for culinary curious home cooks wanting structured guidance. The Molecule-R kit delivers on its promise to make molecular gastronomy accessible, though serious enthusiasts will quickly outgrow the initial additive supply.
2. Spherification Kit [Molecular Gastronomy] ⊘ Non-GMO Vegan OU Kosher Certified Ingredients
![Spherification Kit [Molecular Gastronomy] ⊘ Non-GMO Vegan OU Kosher Certified Ingredients](https://m.media-amazon.com/images/I/51ccHbEPdPL._SL160_.jpg)
Overview: This Spherification Kit offers a focused, budget-friendly entry into molecular gastronomy at just $24.99. Centered exclusively on creating spherified “caviar,” it provides the necessary ingredients and guidance to produce up to 17 cups of pearls. The kit emphasizes dietary inclusivity with Non-GMO, vegan, and OU Kosher certification, making it accessible to users with strict dietary requirements.
What Makes It Stand Out: The strict Orthodox Union certification distinguishes this kit for kosher-keeping households, a rare feature in molecular gastronomy products. The impressive yield of 17 cups of caviar from the included ingredients demonstrates concentration and value. Complete troubleshooting tips address common spherification failures, which is crucial for beginners working with this finicky technique.
Value for Money: At $24.99, this represents exceptional value for those specifically interested in spherification. The per-ounce cost of $4.72 is competitive with bulk specialty ingredients, and the included guidance eliminates costly trial-and-error. However, its narrow focus means additional purchases are necessary for other techniques like gelification or emulsification.
Strengths and Weaknesses: Strengths include affordability, dietary certifications, high yield, and targeted troubleshooting. Weaknesses are the limited scope (spherification only), minimal tool inclusion, and lack of versatility for broader molecular gastronomy exploration. Users seeking variety will need supplementary kits.
Bottom Line: Perfect for budget-conscious cooks or those with kosher/vegan requirements wanting to master spherification. While not comprehensive, it delivers exceptional value for its specialized purpose and provides a low-risk introduction to molecular techniques.
3. ULTIMATE Molecular Gastronomy “Made Easy” Starter Kit ⊘ Non-GMO Gluten-Free

Overview: Positioned as the flagship offering, the Ultimate Molecular Gastronomy “Made Easy” Starter Kit commands a premium $199.99 price tag for comprehensive coverage. This kit targets serious enthusiasts and aspiring professionals with extensive ingredients, professional tools, and a substantial 250-page recipe book covering spherification, gelification, emulsification, and beyond. The manufacturer offers free technical support and a satisfaction guarantee, signaling confidence in product quality and user success.
What Makes It Stand Out: The extensive 250-page recipe book with detailed techniques sets a professional standard unmatched by entry-level kits. Free technical support provides expert troubleshooting, invaluable for complex applications. The “Ultimate” designation suggests a complete ecosystem rather than a sampling, potentially including professional-grade tools and substantial ingredient quantities for extensive experimentation.
Value for Money: At $199.99, this is a significant investment. The value proposition rests on completeness and support rather than bargain pricing. While expensive, purchasing components separately would likely exceed this cost. The caveat about potential substitutions based on availability is concerning at this price point and suggests supply chain variability that could affect specific applications.
Strengths and Weaknesses: Strengths include comprehensive coverage, professional-grade documentation, technical support, and satisfaction guarantee. Weaknesses are the high price barrier and ambiguous ingredient substitution policy. The kit may overwhelm true beginners while underwhelming professional chefs who prefer selecting individual components.
Bottom Line: Ideal for dedicated hobbyists ready to seriously invest in molecular gastronomy. The Ultimate kit eliminates guesswork but requires commitment. Verify current contents before purchasing, as substitution policies could impact expected value for specific recipes.
4. BASIC Molecular Gastronomy “Made Easy” Starter Kit ⊘ Non-GMO Gluten-Free OU Kosher Certified Ingredients

Overview: The Basic Molecular Gastronomy “Made Easy” Starter Kit occupies the entry-level position in its product line at $69.99. While specific contents aren’t detailed in the listing, the “Basic” designation and price point suggest a foundational set of ingredients and essential tools for initial experimentation. The kit maintains the line’s commitment to Non-GMO, gluten-free, and OU Kosher certified ingredients, ensuring broad dietary compatibility.
What Makes It Stand Out: The OU Kosher certification distinguishes this kit for observant Jewish households seeking entry into molecular gastronomy. Positioning within the “Made Easy” ecosystem suggests access to the brand’s educational resources, even if not as extensive as premium versions. The gluten-free and Non-GMO commitments address growing consumer health concerns.
Value for Money: At $69.99, this Basic kit matches the price of the Molecule-R starter set, suggesting similar contents. However, the lack of detailed feature listing makes value assessment difficult. Potential buyers must contact the seller to verify exact components before purchasing. This transparency issue undermines confidence compared to competitors who clearly enumerate contents.
Strengths and Weaknesses: Strengths include kosher certification, gluten-free ingredients, and entry-level pricing within a supported product line. The primary weakness is the complete absence of feature details, forcing customers to make blind purchasing decisions. Without knowing specific tools, additive quantities, or recipe inclusion, comparison shopping is impossible.
Bottom Line: Approach with caution. While the certification and branding are promising, the lack of transparency about contents is a significant red flag. Contact the seller for a complete inventory before considering this against better-documented alternatives at the same price point.
5. PREMIUM Molecular Gastronomy “Made Easy” Starter Kit ⊘ Non-GMO Gluten-Free OU Kosher Certified Ingredients

Overview: The Premium Molecular Gastronomy “Made Easy” Starter Kit strategically bridges the gap between basic and ultimate offerings at $99.99. This mid-tier package provides ingredients, tools, and a comprehensive 250-page recipe book covering diverse techniques suitable for any skill level. Maintaining the line’s commitment to quality, it features Non-GMO, gluten-free, and OU Kosher certified ingredients, complemented by free technical support and a satisfaction guarantee that reduces purchase risk.
What Makes It Stand Out: The inclusion of a professional-grade 250-page recipe book at this price point delivers exceptional educational value typically reserved for more expensive kits. Free molecular gastronomy technical support provides expert backup for challenging techniques, preventing costly failures. The OU Kosher certification (excluding gelatin sheets) makes this accessible to observant households while maintaining ethical sourcing standards that appeal to health-conscious consumers.
Value for Money: At $99.99, the Premium kit offers a compelling sweet spot between the $69.99 Basic and $199.99 Ultimate options. The substantial recipe book and technical support justify the $30 premium over basic alternatives. While ingredient quantities remain unspecified, the satisfaction guarantee mitigates purchase risk. This represents the best value for serious hobbyists not requiring the Ultimate kit’s professional scope.
Strengths and Weaknesses: Strengths include comprehensive documentation, responsive technical support, strong dietary certifications, and balanced pricing. Weaknesses are unspecified ingredient quantities and the gelatin sheet kosher certification exception. The kit successfully balances comprehensiveness with affordability, though ambitious users may eventually require specialized supplements.
Bottom Line: The Premium kit is the optimal choice for dedicated home cooks ready to explore molecular gastronomy seriously. It provides professional resources without the Ultimate kit’s price tag, making it the best value proposition in the “Made Easy” product line.
6. Caviar Maker Box, Spherification Dropper, Molecular Gastronomy Kit, 96 Holes Roe Sauce Dispenser Strainer Tools with Caviar Spoon, Syringe & Suction Tray

Overview: The Caviar Maker Box is a specialized molecular gastronomy tool designed to simplify spherification. This 96-hole dropper system transforms flavored liquids into caviar-like spheres almost instantly, making it accessible for home cooks and aspiring chefs to create restaurant-quality garnishes. The kit includes a strainer tray, syringe, stainless steel caviar spoon, and suction base—everything needed to start experimenting with modernist cuisine techniques right out of the box.
What Makes It Stand Out: The 96-hole design is the star feature, producing dozens of uniform spheres in about one second—dramatically faster than traditional syringe methods. The polycarbonate and silicone construction ensures durability while maintaining food safety standards. Unlike basic kits, this includes a proper caviar spoon and suction tray for stable operation, addressing common pain points of manual spherification. The ability to create fruit, vegetable, or sauce caviar opens up creative possibilities for plating and flavor bursts.
Value for Money: At $25.99, this kit occupies a sweet spot between DIY hacks and professional equipment costing hundreds. For enthusiasts who regularly experiment with molecular gastronomy, the time savings and consistency justify the investment. It’s significantly more efficient than single-droplet methods, and the included accessories eliminate separate purchases. Casual users might find it specialized, but the durable materials ensure longevity for those committed to the technique.
Strengths and Weaknesses: Strengths include rapid production speed, complete accessory set, durable food-safe materials, and straightforward cleaning with detachable parts. Weaknesses involve a learning curve for perfect sphere formation, potential messiness during operation, and its single-purpose nature limiting kitchen versatility. The 96-hole design, while efficient, requires adequate liquid volume to be practical.
Bottom Line: This caviar maker is an excellent investment for molecular gastronomy enthusiasts who value efficiency and consistency. It democratizes a professional technique for home kitchens while delivering reliable results that impress guests and elevate dishes.
7. AnchorChef Molecular Gastronomy Foam Generator, Foam Generating Kit, Professtional Chef Cooking Tool (silver)

Overview: The AnchorChef Foam Generator represents a professional approach to molecular gastronomy foams, leveraging lecithin-based aeration to create stable, fine-textured foams from virtually any liquid. This electric device takes the armwork out of foam production, offering chefs precise control over texture and density. At $69.99, it’s positioned as a serious tool for dedicated modernist cooks rather than a casual toy.
What Makes It Stand Out: Precision control distinguishes this unit—adjustable settings let you dial in everything from light, airy foams to denser, creamier textures. The food-grade airstone technology produces consistently fine bubbles that hold structure longer than hand-whisked alternatives. Its compatibility with diverse ingredients (juices, soups, sauces) expands creative applications beyond typical dessert foams. The user-friendly panel and detachable, easy-clean components address practical kitchen concerns.
Value for Money: While premium-priced, the $69.99 tag reflects professional-grade engineering that would cost significantly more in commercial kitchen equipment. For serious hobbyists or chefs regularly featuring foams on menus, it pays for itself in consistency and labor savings. Casual cooks may balk at the price, but those pursuing molecular gastronomy seriously will appreciate the durability and results that cheaper aerators can’t match.
Strengths and Weaknesses: Strengths include precise texture control, rapid foam production, broad ingredient compatibility, durable food-grade construction, and straightforward maintenance. Weaknesses are the niche application limiting everyday use, additional cost of lecithin, premium pricing that may deter beginners, and counter space requirements. It requires electrical power, reducing portability.
Bottom Line: The AnchorChef Foam Generator is a worthwhile investment for committed molecular gastronomy practitioners who prioritize precision and efficiency. It transforms a tedious manual process into a reliable, repeatable technique worthy of professional kitchens.
8. Kracie Popin’ Cookin’ DIY Candy Sushi Kit, No Bake, 1 Ounces (Pack Of 1)

Overview: The Kracie Popin’ Cookin’ DIY Candy Sushi Kit delivers a delightful blend of culinary creativity and confectionery fun in a no-bake format. This Japanese import allows users to assemble realistic-looking candy sushi using provided powders and molds. At just $5.39, it’s an accessible entry point into edible chemistry experiments, particularly engaging for children and curious food lovers who enjoy hands-on kitchen projects without complex techniques.
What Makes It Stand Out: The kit’s charm lies in its transformation of simple powders into gummy rice, fish, and nori through water activation and molding. Its no-bake design eliminates cooking risks, making it exceptionally kid-friendly. The educational aspect—demonstrating basic food science principles—adds value beyond mere entertainment. The final product’s impressive visual resemblance to actual sushi creates a memorable experience that photographs beautifully for social sharing.
Value for Money: At $5.39, this kit offers exceptional entertainment value, functioning as both a snack and an activity. It’s cheaper than most experiential food kits while delivering multiple components and a satisfying result. Compared to purchasing individual candy-making ingredients, the pre-measured portions and specialized molds make this a cost-effective one-time experience. The novelty factor justifies the price for gift-giving or party activities.
Strengths and Weaknesses: Strengths include affordability, child-safe operation, educational value, impressive visual results, and minimal cleanup. Weaknesses involve artificial flavors and colors, small portion size, single-use nature creating waste, and limited nutritional value. The instructions can be confusing without Japanese literacy, requiring online translation. Serious gastronomy enthusiasts will find it too simplistic.
Bottom Line: This candy sushi kit excels as an affordable, engaging activity for kids and families. While not gourmet cooking, it successfully combines entertainment with edible results, making it perfect for parties, gifts, or introducing young ones to food science concepts.
9. DIY Popping Boba Kit – Make Juice Pearls at Home | Sodium Alginate & Calcium Lactate Set, 2oz Each, Food Grade, Molecular Gastronomy Starter Kit

Overview: The DIY Popping Boba Kit provides the essential chemical components—sodium alginate and calcium lactate—to create authentic popping boba pearls at home. This kit empowers users to transform any juice into colorful, bursting spheres, offering a customizable alternative to store-bought toppings. At $22.99, it targets bubble tea enthusiasts and molecular gastronomy beginners seeking a fun, interactive kitchen project with delicious, shareable results.
What Makes It Stand Out: The three-step process simplifies spherification into an accessible technique achievable in minutes. The food-grade, non-GMO, vegan ingredients appeal to health-conscious consumers wanting additive-free boba. Producing up to 300 pearls per batch delivers substantial volume for parties or regular use. The versatility extends beyond drinks to desserts, yogurt bowls, and cocktails, maximizing creative applications. Using personal juice selections allows unique flavor combinations impossible to find commercially.
Value for Money: Creating 300 pearls for $22.99 costs significantly less than purchasing pre-made boba, especially for specialty flavors. The kit’s reusability—only requiring fresh juice and water—provides ongoing value after initial purchase. While specialized, the entertainment and customization factors justify the price for boba lovers. Compared to professional spherification kits, this offers an affordable entry point with sufficient ingredient quantity for extensive experimentation.
Strengths and Weaknesses: Strengths include natural ingredients, high yield, flavor customization, kid-friendly operation, and clear instructions ideal for beginners. Weaknesses involve requiring precise measurements for success, potential mess during pearl formation, limited shelf life of fresh pearls, and cleanup of the viscous sodium alginate solution. The process demands patience and practice for perfect spheres.
Bottom Line: This popping boba kit is a fantastic choice for bubble tea fans and DIY food experimenters. It delivers genuine molecular gastronomy results with natural ingredients at a reasonable price, making it an excellent gift or kitchen adventure.
10. Cape Crystal Sodium Alginate and Calcium Chloride – Spherification Value Kit - Practice Molecular Gastronomy, 4-Oz.

Overview: The Cape Crystal Spherification Value Kit strips molecular gastronomy to its essentials, providing just sodium alginate and calcium chloride for creating juice spheres through basic spherification. This back-to-basics approach targets budget-conscious beginners wanting to explore modernist techniques without investing in elaborate equipment. At $17.95 for four ounces total, it prioritizes ingredient quality and accessibility over convenience features.
What Makes It Stand Out: The kit’s simplicity is its defining characteristic—two pure, certified ingredients without unnecessary frills. Non-GMO, vegan, and kosher certifications ensure broad dietary compatibility and ethical sourcing. The accompanying how-to video provides crucial visual guidance for this technique-sensitive process. By focusing solely on core chemicals, it allows users to source tools separately, customizing their setup while learning fundamental spherification principles.
Value for Money: This is among the most affordable legitimate spherification kits available, making molecular gastronomy accessible to skeptical beginners. The ingredient quality rivals premium brands at a fraction of the cost. While requiring separate syringes or spoons, the $17.95 price point leaves budget for these basic tools. For those unsure about committing to molecular gastronomy, this offers a low-risk trial. The four-ounce quantity provides sufficient material for numerous experiments.
Strengths and Weaknesses: Strengths include exceptional affordability, high-quality certified ingredients, dietary inclusivity, educational value, and adequate supply for practice. Weaknesses are the lack of included tools requiring separate purchases, steeper learning curve without a dedicated device, potential frustration for absolute beginners, and basic spherification’s time-intensive nature compared to reverse methods. The minimalist packaging feels less gift-worthy.
Bottom Line: This value kit is the perfect starting point for curious cooks wanting to experiment with spherification without financial commitment. It delivers professional-grade ingredients at a beginner-friendly price, ideal for learning core molecular gastronomy techniques.
What Is Molecular Gastronomy and Why Does It Matter?
Molecular gastronomy transcends trendy foams and liquid nitrogen theatrics. At its core, it’s the scientific investigation of physical and chemical transformations that occur during cooking. This discipline examines why eggs solidify at specific temperatures, how starches thicken sauces, and what creates the perfect bread crust. Modern kits democratize these principles, allowing you to manipulate hydrocolloids, understand protein denaturation, and explore viscosity control through tangible experiments. The educational value extends far beyond impressive dinner party tricks—you’re developing a fundamental understanding of food structure that improves everyday cooking techniques.
The $75 Sweet Spot: Quality Science on a Budget
The under-$75 price point represents a critical threshold where manufacturers must make intentional decisions about quality versus quantity. Kits in this range typically exclude expensive equipment like immersion circulators or vacuum chambers, focusing instead on the essential chemical agents and hand tools that define foundational techniques. This constraint often works in your favor, forcing a curriculum-based approach rather than overwhelming you with obscure additives you’ll never use. The best kits at this price prioritize high-purity, food-grade chemicals in appropriate quantities and durable manual tools that demonstrate principles without digital shortcuts.
Essential Components Every Kit Should Include
Critical Chemicals and Additives
A legitimate molecular gastronomy kit must contain food-grade hydrocolloids—the polysaccharides and proteins that modify texture. Sodium alginate and calcium chloride enable basic spherification, creating those signature caviar-like spheres. Agar-agar serves as the backbone for gelification, offering vegetarian alternatives to gelatin with unique thermal properties. Look for kits including lecithin for foams, carrageenan for dairy gels, and methylcellulose for heat-reversible gels. The quantities should be measured in grams, not ounces, reflecting the precision this science demands. Beware of kits listing “mystery powders” without chemical names—transparency indicates educational integrity.
Must-Have Manual Tools and Equipment
Precision matters more than automation in foundational molecular gastronomy. Your kit should include digital scales measuring to 0.1-gram accuracy—non-negotiable for reproducible results. Slotted spoons specifically designed for retrieving delicate spheres, silicone hemisphere molds for creating uniform shapes, and precision syringes or pipettes for controlled droplet formation separate professional approaches from kitchen hacks. Syringes with Luer-lock connections prevent messy disasters, while fine-mesh strainers should feature heat-resistant handles. Avoid kits substituting toys for tools; a cheap plastic syringe that leaks destroys both your experiment and your understanding.
Educational Materials and Recipe Guides
The instruction manual determines whether your kit becomes a one-time novelty or a lasting educational resource. Quality guides explain not just the “how” but the “why”—detailing pH sensitivity in sodium alginate solutions, hydration temperatures for different hydrocolloids, and the Maillard reaction’s role in flavor development. Look for spiral-bound manuals that lay flat during experiments, include troubleshooting charts for common failures (like sphere membrane toughness), and provide progressive recipes that build skills systematically. QR codes linking to video demonstrations indicate manufacturers invested in genuine learning, not just product sales.
Understanding the Science Behind the Techniques
Spherification isn’t magic—it’s controlled diffusion and gelification. When sodium alginate (a polymer extracted from brown algae) meets calcium ions, it forms a gel membrane through ionic cross-linking. Your kit should help you understand basic versus reverse spherification, why acidic liquids require sodium citrate adjustment, and how membrane thickness correlates with immersion time. Similarly, creating stable foams with lecithin teaches emulsification principles applicable to vinaigrettes and aioli. The best kits frame each technique as a reproducible experiment with variables to manipulate, not a parlor trick to master once.
Critical Features to Evaluate Before Buying
Ingredient Purity and Food-Grade Certification
Food-grade certification isn’t marketing fluff—it’s your safety guarantee. Pharmaceutical-grade chemicals may be purer but aren’t tested for ingestion safety. Look for FCC (Food Chemicals Codex) compliance or EU food additive E-numbers on packaging. The source matters: sodium alginate should specify “high-G” (guluronic acid) content for stronger gels. Carrageenan type (kappa, iota, lambda) should be clearly labeled, as each creates different textures. Kits using opaque “proprietary blends” prevent you from understanding reaction mechanisms and limit reproducibility.
Tool Durability and Material Safety
Silicone molds must be platinum-cured, not tin-cured, to withstand temperature extremes and repeated alcohol extractions. Stainless steel tools should specify 304 or 316 grade—lower grades corrode when exposed to acidic calcium chloride baths. Syringes and tubing should be medical-grade polypropylene, not PVC, which can leach plasticizers into food. Check for BPA-free certification on any plastic components. These details separate kits designed for repeated educational use from disposable novelties.
Recipe Complexity and Skill Progression
Evaluate the included recipe index for educational scaffolding. Beginner recipes should require 3-4 steps and demonstrate one principle clearly—like basic olive oil caviar. Intermediate techniques combine multiple hydrocolloids, perhaps creating hot ice cream that melts backward. Advanced recipes might involve enzyme applications (transglutaminase “meat glue”) or multi-stage processes. A quality kit provides 20-30 recipes spanning this spectrum, with “experiment extensions” suggesting variable modifications. Avoid collections featuring more cocktails than food science—they prioritize spectacle over substance.
Packaging and Storage Solutions
Molecular gastronomy chemicals are hygroscopic (they absorb moisture) and degrade with light exposure. Individual resealable foil pouches with oxygen absorbers maintain potency far better than bulk containers. Amber glass bottles for liquid solutions like calcium chloride prevent UV degradation. The storage system should include a labeling system for opened chemicals with purchase dates, as even stable hydrocolloids lose efficacy over time. Kits providing desiccant packets and storage recommendations demonstrate attention to shelf-life science.
Matching Kits to Your Experience Level
Beginner-Friendly Features
If you’re new to food science, prioritize kits emphasizing observation over complexity. Look for “single-variable” experiments where only one component changes between recipes—this isolates cause and effect. Color-coded chemical pouches with large safety icons reduce intimidation. Beginner kits should include pre-measured “experiment packs” for first attempts, eliminating scale anxiety while you learn technique. The manual should define terms like “hydration,” “shear-thinning,” and “gelation point” in sidebar glossaries, building vocabulary alongside skills.
Intermediate Experimentation
For those comfortable with basic techniques, seek kits offering “modular” chemical sets where you purchase refill packs of individual hydrocolloids. This allows exploring ratios and combinations—like blending agar with locust bean gum for elastic gels. Intermediate kits should include tools for measuring pH (test strips or a simple meter) and temperature control beyond basic thermometers. Recipes at this level introduce time as a variable, teaching how gel strength develops over 24 hours or how enzymatic reactions progress.
Advanced Techniques on a Budget
Advanced practitioners can stretch sub-$75 kits by focusing on versatile, high-impact chemicals. Transglutaminase (meat glue) applications, though expensive per gram, teach protein cross-linking principles applicable to texture modification. Sodium citrate’s role in melting cheese smoothly demonstrates pH manipulation. Advanced kits might include small quantities of these specialty enzymes with detailed protocols for creating “noodles” from shrimp paste or “bread” from cheese. The value lies in understanding reaction kinetics you can apply to larger-scale experiments with independently sourced materials.
Safety Protocols for Home Food Science
Molecular gastronomy involves chemicals that are safe in food but require respect. Your kit must include safety data sheets (SDS) for each chemical, detailing what to do if inhaled or contacting skin. Calcium chloride creates exothermic reactions when dissolving—kits should warn against handling the concentrated solution. Sodium alginate dust can irritate lungs; mixing in ventilated areas matters. The best kits provide nitrile gloves (not latex, which degrades with some chemicals) and safety goggles that fit over eyeglasses. They should explicitly state which tools are food-dedicated and never to be used with non-food-grade materials.
Maximizing Educational Value Beyond Recipes
Understanding Chemical Reactions as Experiments
Treat each recipe as a hypothesis test. Your kit should encourage keeping a lab notebook—recording exact measurements, ambient temperature, and humidity. Did your spheres fail? Note the juice’s pH and sugar content. Successful gel? Record the hydration time and temperature. This transforms cooking into reproducible science. Quality kits include data tables for recording observations and “failure analysis” sections explaining why experiments go wrong, connecting outcomes to variables like ion concentration or polymer chain length.
Temperature Control and Precision
Many molecular gastronomy failures stem from temperature misuse. While sub-$75 kits lack immersion circulators, they should include precision thermometers (±0.5°F accuracy) and teach manual temperature control techniques. Understanding that agar sets at 95°F but remains stable to 185°F explains why it’s ideal for hot gels. Kits should include instructions for creating ice baths with salt to achieve sub-zero temperatures for rapid spherification setting, demonstrating colligative properties without expensive equipment.
Common Pitfalls When Choosing Budget Kits
Beware of kits advertising “50+ recipes” but providing only 5 grams of each chemical—this forces immediate repurchases. Avoid sets with pre-mixed “magic powders” that prevent understanding individual component functions. Kits focusing solely on sweet applications limit learning; spherification works brilliantly with savory consommés and balsamic vinegar. Check that included tools are sized for typical home batches—industrial-sized molds waste expensive chemicals on experiments you’ll discard. Finally, verify the kit’s chemicals aren’t nearing expiration; sodium alginate older than two years loses gelling power, a fact ethical manufacturers print on packaging.
Expanding Your Laboratory Beyond the Initial Kit
A quality starter kit serves as a foundation, not a limitation. It should include a supplier list for purchasing individual chemicals in bulk—buying 100g of sodium alginate costs pennies per experiment compared to kit prices. The manual should reference standard concentrations (e.g., 0.5% sodium alginate for basic spherification) so you can scale recipes independently. Look for kits that suggest “kitchen hacks” like using a slotted spoon instead of their specialized spoon once you understand the principle. This educational exit strategy indicates the kit’s goal is teaching, not trapping you in a proprietary system.
Ingredient Storage and Shelf Life Management
Hydrocolloids typically last 12-24 months if stored properly, but liquid solutions last days. Your kit should provide guidance: calcium chloride solution stays stable for a month refrigerated, but sodium alginate solutions degrade within 48 hours due to microbial growth. Include silica gel packets in chemical storage containers and maintain a inventory log. Some advanced kits provide chemical stability charts showing how humidity above 60% accelerates clumping in hygroscopic powders. Understanding these storage principles prevents wasted materials and failed experiments due to degraded reagents.
Creating a Dedicated Molecular Gastronomy Workspace
You don’t need a full lab, but a designated space improves results. Your kit’s manual should recommend a heat-resistant mat for working with calcium chloride exothermic reactions and a dedicated cutting board for preparing experimental samples. A small fan improves ventilation when working with fine powders. The best kits suggest organizing chemicals in a plastic storage box with separate compartments, treating it like a portable lab that can be stored away from food prep areas. This separation reinforces safety protocols and keeps tools clean.
DIY Alternatives and Kit Supplementation
Even the best kit benefits from DIY enhancements. Your guide should explain which tools can be improvised: a simple squeeze bottle replaces expensive anti-griddle droppers for creating caviar. Coffee filters work for clarifying stocks through freeze-thaw filtration. The kit should teach you to recognize when DIY is appropriate (creating a water bath with a cooler) versus when precision matters (digital scales). This empowers you to invest kit savings into higher-quality chemicals rather than redundant tools, maximizing your $75 budget’s scientific return.
Progressive Skill Building with Limited Chemicals
Master a few chemicals deeply rather than many superficially. A smart kit focuses on sodium alginate, agar, and lecithin—versatile agents that demonstrate multiple principles. Learn sodium alginate’s pH sensitivity, how calcium concentration affects membrane thickness, and why reverse spherification works better for acidic mediums. Then apply these principles: use agar’s thermo-reversibility to create hot custards that melt when cooled, or lecithin’s amphiphilic nature to stabilize both oil foams and water-based airs. Depth creates transferable knowledge; breadth creates a cluttered pantry.
Community Resources and Continued Learning
The best kits connect you to broader learning ecosystems. Look for QR codes linking to video libraries demonstrating proper syringe angle for sphere formation or how to recognize “broken” emulsions. Some manufacturers maintain moderated forums where users share pH-adjusted recipes or troubleshoot failed gels. The manual should reference foundational texts like “Modernist Cuisine at Home” for deeper theory and note which techniques your kit introduces versus which require specialized equipment. This creates a learning pathway beyond the kit’s contents, positioning it as a gateway rather than a complete solution.
Frequently Asked Questions
What age is appropriate for using molecular gastronomy kits?
Most kits are designed for ages 12 and up with adult supervision, primarily due to the precision required and chemical handling. However, the determining factor isn’t age but maturity and ability to follow detailed protocols. Younger learners can succeed with simplified techniques like basic foam creation using lecithin, while complex spherification requires the focus typically seen in high school chemistry students. Always check the manufacturer’s specific age recommendations and SDS sheets.
How do I know if chemicals are truly food-grade?
Legitimate food-grade chemicals carry FCC (Food Chemicals Codex) certification or EU E-number designations. Reputable manufacturers provide lot numbers and certificates of analysis (COA) upon request. Avoid chemicals labeled “reagent grade” or “technical grade” as these may contain impurities unsafe for ingestion. The packaging should explicitly state “food grade,” and the SDS should list ingestion risks under food-use concentrations, not just industrial exposure scenarios.
Can I use these techniques with any recipe?
Not without modification. Molecular gastronomy chemicals respond to pH, calcium content, temperature, and alcohol levels. You can’t simply add sodium alginate to any liquid and expect spherification. Successful adaptation requires understanding each ingredient’s function: acidic juices need sodium citrate buffering, high-alcohol content prevents gel formation, and enzyme-based techniques require specific temperature ranges. Start with kit recipes, then apply learned principles to modify personal recipes systematically.
Why do my spheres keep failing?
Sphere failure typically stems from three issues: incorrect pH (below 3.5 prevents gelation), insufficient calcium concentration, or improper sodium alginate hydration (must be blended, not stirred). Temperature affects setting speed—cold liquids form thicker membranes. Check your water source too: distilled water lacks calcium needed for reverse spherification, while hard water contains excess calcium that pre-gels your alginate solution. Keep a failure log to identify patterns.
How long do opened chemicals last?
Most hydrocolloids remain stable for 12-18 months if stored in airtight containers with desiccants at room temperature. However, sodium alginate degrades faster (9-12 months) when exposed to humidity. Mark opening dates on containers. Liquid solutions have much shorter lives: calcium chloride lasts 4-6 weeks refrigerated, while hydrated hydrocolloid solutions develop microbial growth within 48 hours. Always prepare solutions fresh for critical experiments.
Are these kits safe for people with food allergies?
Many hydrocolloids derive from potential allergens. Carrageenan comes from seaweed (iodine sensitivity), agar from algae, and some lecithin from soy. Manufacturers rarely process these in allergen-free facilities. If you have severe allergies, contact the manufacturer for detailed allergen statements. For home use, dedicate tools exclusively to molecular gastronomy to prevent cross-contamination, and thoroughly document all chemical sources for medical reference.
Can I substitute ingredients if I run out?
Direct substitution rarely works due to specific functional properties. However, understanding chemical classes helps: you can’t replace sodium alginate with agar, but you might substitute calcium lactate gluconate for calcium chloride (though concentrations differ). The kit’s manual should provide substitution charts with conversion ratios. For educational purposes, running out of an ingredient is valuable—it forces you to research its specific function rather than treating it as a magical powder.
What’s the difference between basic and reverse spherification?
Basic spherification drops sodium alginate liquid into a calcium bath, forming a gel membrane through diffusion. The membrane continues thickening until the sphere solidifies, creating a time-sensitive process best for immediate service. Reverse spherification flips this: calcium-rich liquid drops into an alginate bath, forming a thinner, more stable membrane that stops thickening once removed. Reverse works better for acidic ingredients and allows advance preparation. Your kit should explain both methods and their scientific rationale.
Do I need special cleaning procedures for tools?
Yes. Calcium chloride residues can etch stainless steel over time—rinse tools immediately after use. Hydrocolloid films require hot water (above 140°F) to dissolve fully; dishwashers may leave invisible residues affecting future experiments. Use dedicated brushes for syringes to prevent cross-contamination. Some chemicals react with common detergents—avoid bleach-based cleaners on tools used with enzymes. Store cleaned tools separately from regular kitchen utensils to maintain experimental integrity.
How can I document my experiments scientifically?
Treat each recipe as a lab report. Record independent variables (ingredient brands, temperatures, pH) and dependent outcomes (texture, stability, taste). Photograph results with scale references. The kit should provide data sheets for recording observations like “sphere burst pressure” or “gel melting point.” Date all entries and note environmental conditions—humidity above 60% affects hydrocolloid performance. This documentation transforms cooking into reproducible research, the hallmark of genuine food science.